 ROADBOOK MAKER
How to read a rally roadbook
A roadbook is a column of boxes read from top to bottom. Each box is a junction or a key point, with its distance and a tulip: a drawing of what you are about to see. With these four keys you are ready for your first ride.
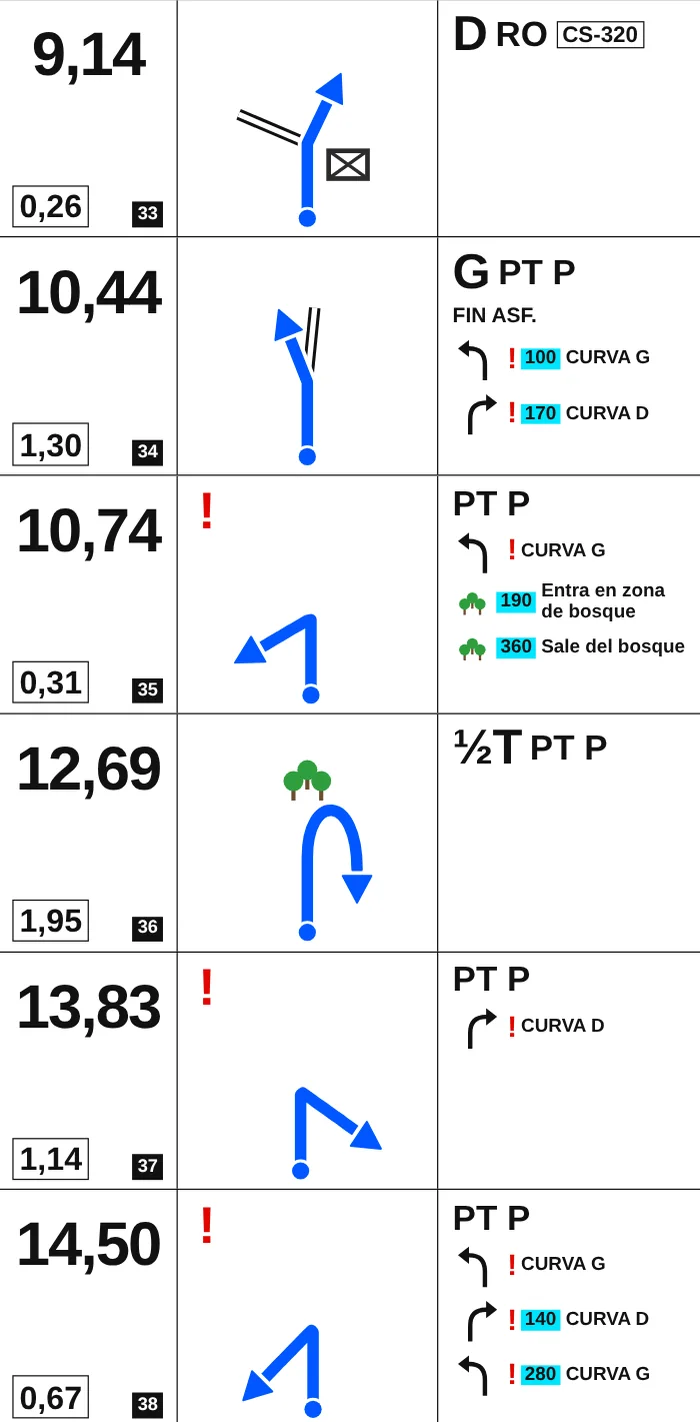
1. The distances (left column)
The big number is the total distance: the distance from the start, in kilometres. Compare it with your trip meter (the ICO) to know when the junction is coming. Below it, boxed, is the partial: the distance from the previous box. And the box number, so you don't get lost if you skip one.
2. The tulip (middle column)
The tulip is the junction seen from above. You always enter from the dot at the bottom and the line with the arrow shows where to go (in blue in Roadbook Maker). The other tracks are drawn so you can recognise the junction:
| Line | Type of way |
|---|---|
| Double line | Road |
| Solid line | Dirt track |
| Dash-dot line | Trail |
| Dashed line | Off-piste |
3. Notes, dangers and landmarks (right column)
Dangers are marked with exclamation marks: ! caution, !! danger, !!! serious danger. Next to them, the obstacle: gate, chain, ford, level crossing, bump, bend or hairpin. Landmarks (houses, springs, fuel stations, rivers, power lines, villages or the road number) confirm you are on the right way. Distances in metres go in a cyan box. You'll find every symbol in the roadbook symbols guide.
4. The CAP
When the route goes cross-country there is no track to draw, so the roadbook gives you the CAP: the heading in degrees, in a yellow box. The RM Roadbook app shows you the real CAP from the GPS so you can compare.
Tips for your first ride
- Reset the partial at every box: that way you only count towards the next junction.
- Always read the next box before you reach the current one.
- If a landmark doesn't appear where it should, go back to the last box you were sure of and correct the trip meter.
- Start with short rides on tracks you know.
Make your own roadbook
With Roadbook Maker you turn any GPX into a roadbook like this one, for free. See how to convert a GPX to a roadbook or open it straight away:
Create my roadbook for free